


I’ve never been more excited to be in tech and build products.
As someone who doesn’t come from a technical background, there are now tools that can help me create apps and automations. These AI agents will not only speed up your work but also help you automate tasks where you used to have to hire a real person to do it.
I’ve been building these automated workflows for my clients and for my own business, Marketer Milk, for the past six months. And in this article, I’m going to show you how to build AI agents the right way.
No coding needed. No need to spend a crazy amount of time and money to build.
In fact, we are going to create an AI agent in this article, and I’m going to show you how to do it completely free.
It’s time to lock in. This is going to be a good one.
What is an AI agent?
An AI agent is an autonomous workflow that runs without human intervention. They’re designed to help you automate tasks in your day-to-day workflows. Today, they are simply automations you can set up to run tasks in the background based on directions you give it once.
But in the future, AI agents will evolve to be able to identify tasks on their own to automate, improve workflows, and help find inefficiencies in your entire organization.
It’s safe to say there’s never been a better time to be in tech and to build a business. So in this article, I’m going to show you a real example of how to build AI agents that will blow your mind. Where going to create one live in this article and actually use it.
Get ready.
5 steps to building your own AI agent in 2025
Here's a step-by-step guide on how to build AI agents:
- Document an existing workflow you could teach someone to do
- Identify all the tools you currently use in that workflow
- Find an AI agent builder platform
- Create your AI automated workflow
- Build your team of AI agents
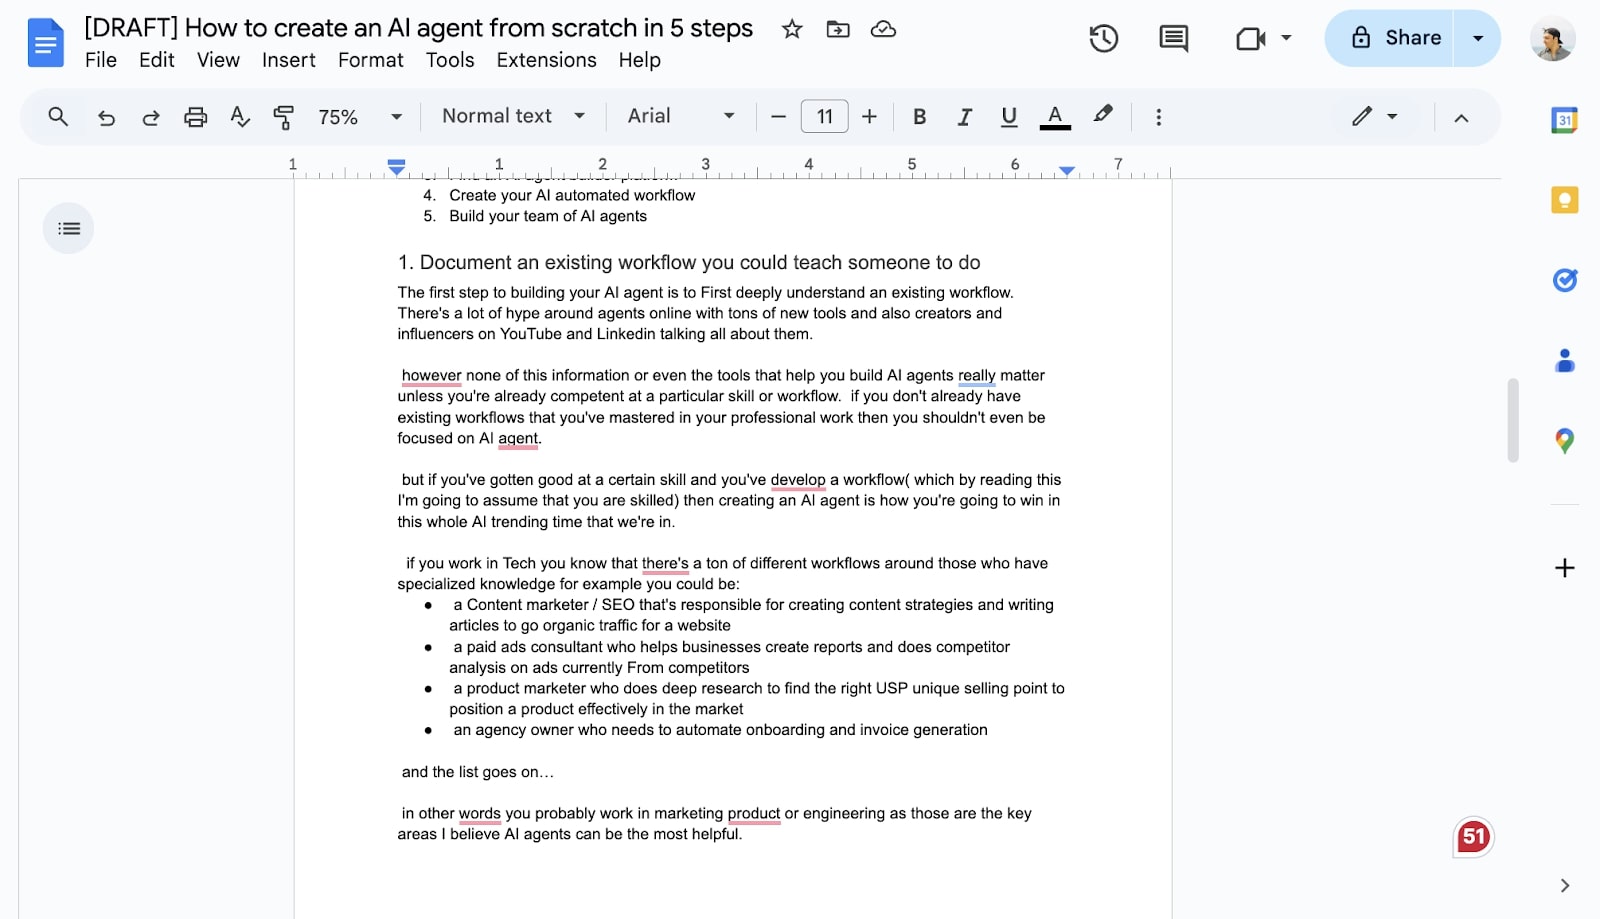
1. Document an existing workflow you could teach someone to do
The first step to building your AI agent is to first deeply understand an existing workflow. There's a lot of hype around agents online, with tons of new tools and also creators and influencers on YouTube and LinkedIn talking all about them.
However, none of this information, or even the tools that help you build AI agents, really matter unless you're already competent at a particular skill or workflow. If you don't already have existing workflows that you've mastered in your professional work, then you shouldn't even be focused on AI agents.
But if you've gotten good at a certain skill and you've developed a workflow (which, by reading this, I'm going to assume that you are skilled), then creating an AI agent is how you're going to win in this whole AI-trending time that we're in.
If you work in tech, you know that there's a ton of different workflows around those who have specialized knowledge. For example, you could be:
- A content marketer / SEO that's responsible for creating content strategies and writing articles to grow organic traffic for a website
- A paid ads consultant who helps businesses create reports and does competitor analysis on ads currently from competitors
- A product marketer who does deep research to find the right USP (unique selling point) to position a product effectively in the market
- An agency owner who needs to automate onboarding and invoice generation
And the list goes on…
In other words, you probably work in marketing, product, or engineering, as those are the key areas I believe AI agents can be the most helpful.
And because this article is about learning how to build AI agents, I think it's appropriate for me to build an AI agent for my own workflow. If you are a subscriber of my newsletter, YouTube channel, or have been on this blog before, you might know that I work as a content marketer and SEO full-time.
So, for the sake of this article, I'm going to build an AI agent around a workflow to help me write blog posts faster. I'm not a big proponent of using AI to create content, as I don't believe that it ranks well and I've never used AI for this blog. But I have begun to experiment with a workflow where I talk out my blog post and then use AI to help me edit it into SEO-friendly articles that I can publish. For example, I'm using the AI agent for this exact blog post you're reading right now.
So that's what I'm going to go with for the rest of this article: create an AI agent around my content-writing process to help me create and publish blog posts that are 100% human-written with my own original ideas, but that now take me half the time to produce.
Is it possible? Yes. Now on to the next section.
2. Identify all the tools you currently use in that workflow
Once you've identified the workflow that you want to create an AI agent for, it's time to identify all the tools that are in that workflow.
If we revisit step one, the goal for the rest of this article is to create an AI agent that can help me edit content in an SEO-friendly way based off of a draft of me simply speaking and using speech-to-text.
In the content-marketing world, as it pertains to AI marketing, the general consensus is that you can use AI to generate content and then you should use a human to edit that content.
But I think that's completely backwards, and I think you should use a human to generate content and then use AI to edit that content.
In other words, the AI agent we're going to build is a copy-editor AI agent. Spoiler alert: this is just one small agent that can then be a part of a bigger army of agents that work together to help with everything from content research to content editing and even content publishing.
But to not get too far off or jump the gun to step 5, let's see what tools I use in this workflow currently. Right now I use:
- Google Docs to write my blog posts
- Grammarly to help me identify mistakes to edit
- Frase to help me find what keywords to include in my articles
- Google Search to figure out the search intent of my blog posts and to manually create content outlines
- And, more recently, Claude to help me clean up and edit some grammar mistakes
As you can see, the tooling is not complex. However, it's time-consuming—not only just to type out text with my laptop but to also review all the grammar fixes Grammarly recommends and to manually copy and paste text into Claude to help me edit.
So, really, to build this AI agent we need to make sure it can integrate with:
- Google Docs
- An LLM (large language model)
- Other existing SEO tools or our CMS
The last one is tricky, but it can be done now with MCP (Model Context Protocol).
Right now, this AI-agent workflow is quite simple. But it can get complex and be tricky to build depending on the tool that we use to help us automate this, which brings us nicely into the next section.
3. Find an AI agent builder platform
In order to build AI agents quickly, we need to use an AI agent platform that can integrate with our existing tech stack and any LLM.
I've reviewed tons of AI agent builders, all the way from the most popular one, n8n, to newer ones that not many talk about but I think are great, like Gumloop.
In fact, I'd go as far as saying that these two are the most popular right now, and you can check out this article on which one I think you should go with. But to keep this part short, my recommendation is that:
- You should use Gumloop if you want a clean user interface and you're not that tech-savvy or you don't care about creating a self-hosted AI agent
- You should use n8n if you're a bit more technical and you care about self-hosting your AI agent
In simple terms, I would say that Gumloop is to iOS as n8n is to Android.
And I'm a simple guy, so I'm going to go with Gumloop, as I don't see a lot of people talking about it, but it's a company that's growing really fast with a really small team in San Francisco. And no, they did not pay me to say this and I'm not an investor in the tool, I just think it's great.
I even messaged the CEO, Max, and visited the Gumloop office in San Francisco this past March. Gumloop also has a very generous free plan, which we're going to use to build our AI agent with. However, if you do want to upgrade to a paid plan, Max gave me a 20% off coupon code for my readers. You can use the code MARKETERMILK at checkout if you want that discount.
Okay, now let's get into the actual building.
4. Create your AI automated workflow
Okay, time to lock in and build our first AI agent. And to prove that it’s going to work, I’m going to use it for this exact article you’re reading.
I’m also going to use Gumloop’s free plan to show you that you don’t even need to pay to launch your first AI agent.
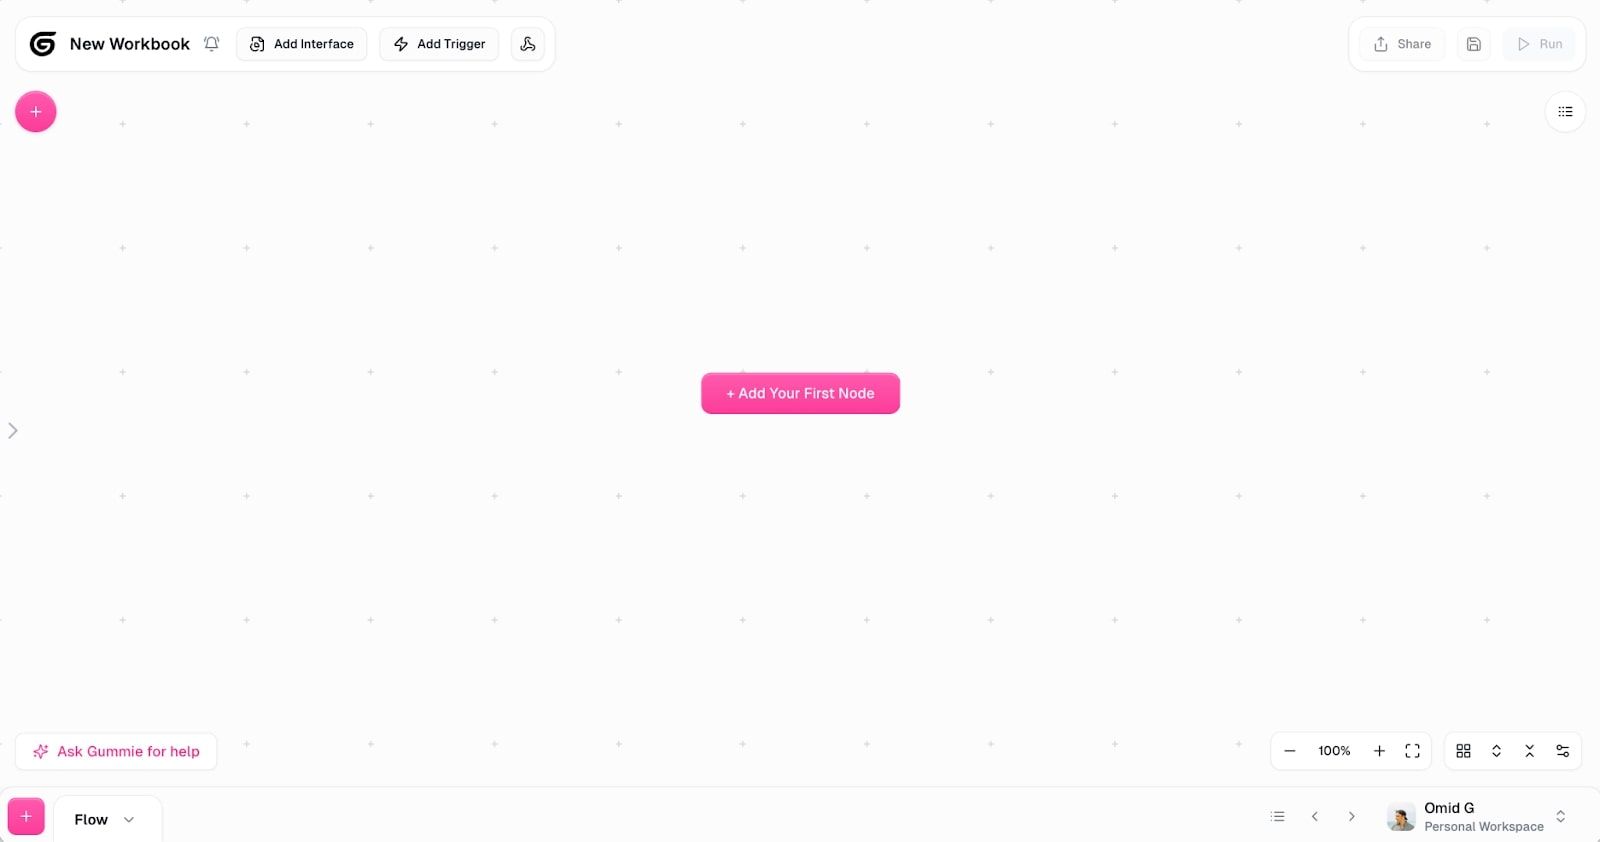
First step, sign up for a free Gumloop account. Once logged in, you want to click on ‘Create Flow’.
Next, you’ll be prompted to your AI agent builder canvas. This is where you can visually build out the logic for your automations.
You have two options here. Either ask ‘Gummie’ to help you create a flow, or build one manually. The Gummie feature is actually quite impressive. It’s the best use case of AI I’ve personally seen inside of SaaS product.
It’s pretty much like your own assistant to help you figure out:
- What to build
- How to build it
But in this case, I’m going to go hard mode and build it manually. If we get stuck, we can ask Gummie to help us. It can view our flow and give us improvements or help us if we get stuck.
If you remember from step two in this article, we went over the workflow and tools we need to create this AI proofreader agent. Our flow is quite simple, we are just using Google Docs and an LLM to be our proofreader.
As a recap, we need the agent to:
- Get access to our blog draft full of grammar mistakes.
- Send that draft to an LLM of choice with context on the Google draft.
- Prompt the LLM to only proofread our article. We don’t want it to rework it too much or rewrite sections. We want to be 100% human still, it should only do the work of what a human proofreader would have done.
- Get a newly edited Google Doc draft sent to us with an article that’s ready to publish.
Easy peasy lemon squeezy.
Of course, Gumloop can do way more than this. This is probably a level 1 easy mode AI agent to build. But it will be just one agent we will use in our army of a marketing and content team of agents.
Okay, in Gumloop click ‘Add first node’ and then the side panel will open with different nodes we can add. These “nodes” are essentially tools and APIs we can pull from.
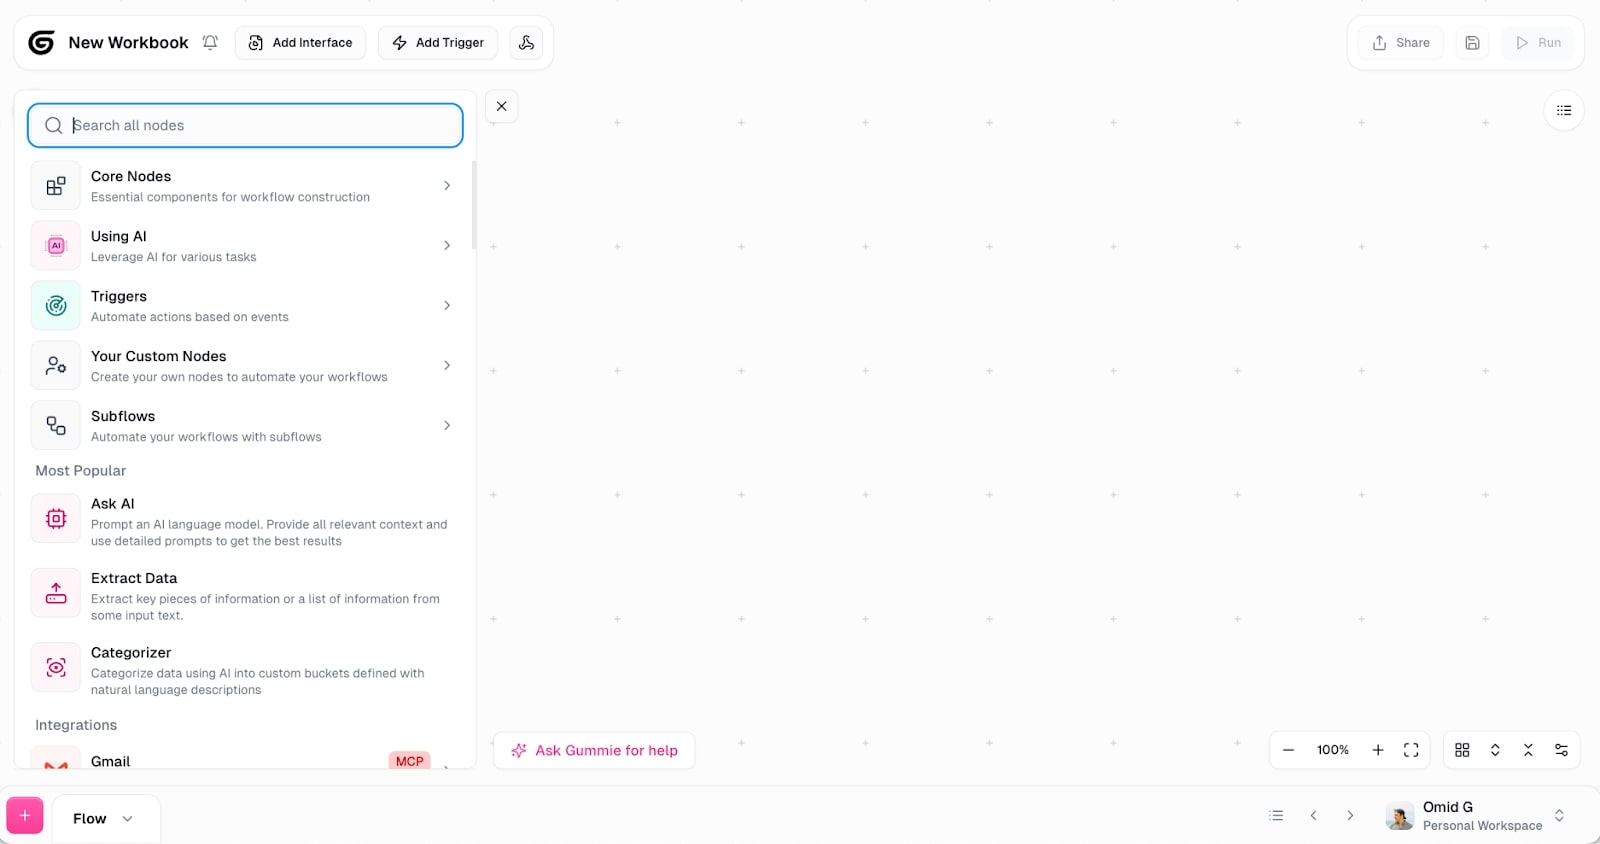
Explore all the tools and see what you can add for your automations. You’ll be surprised with how many options there are. And now with MCP, you can easily create your own nodes if they don’t already exist.
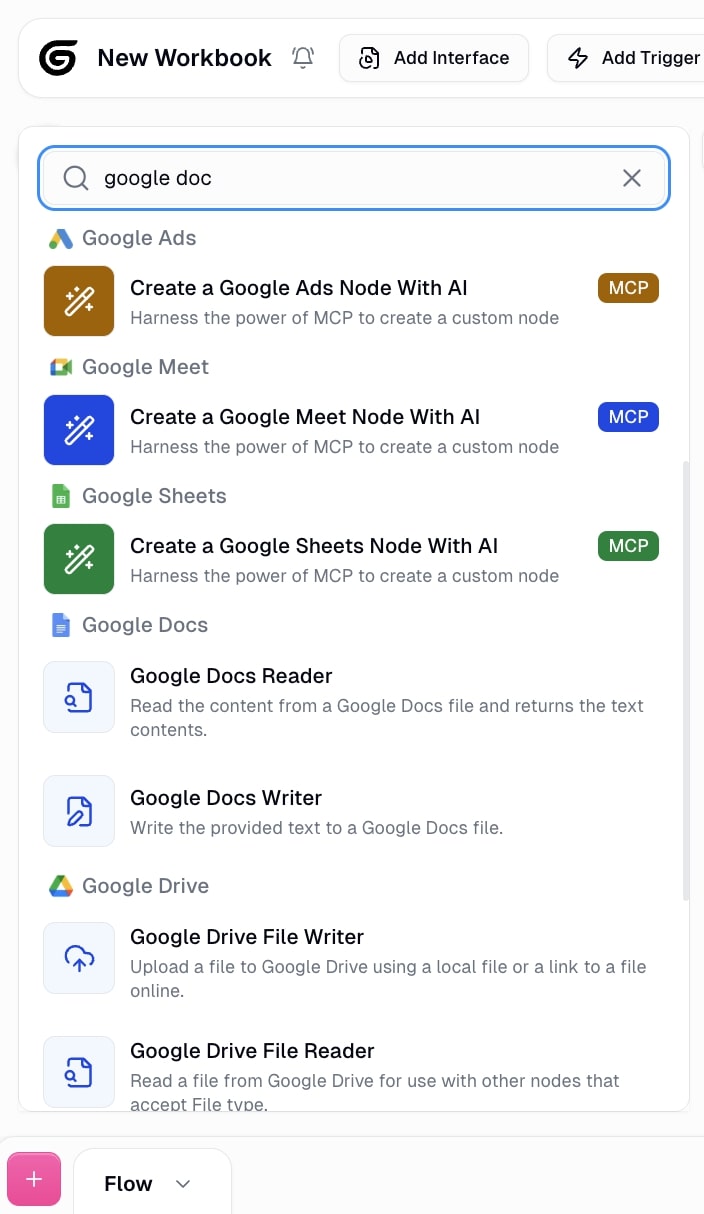
For this, I searched Google Doc and we can see there are two options: Google Docs Reader and Google Docs Writer.
The reader is what we will use for the AI agent to first read our initial blog draft. Drag that onto the canvas.
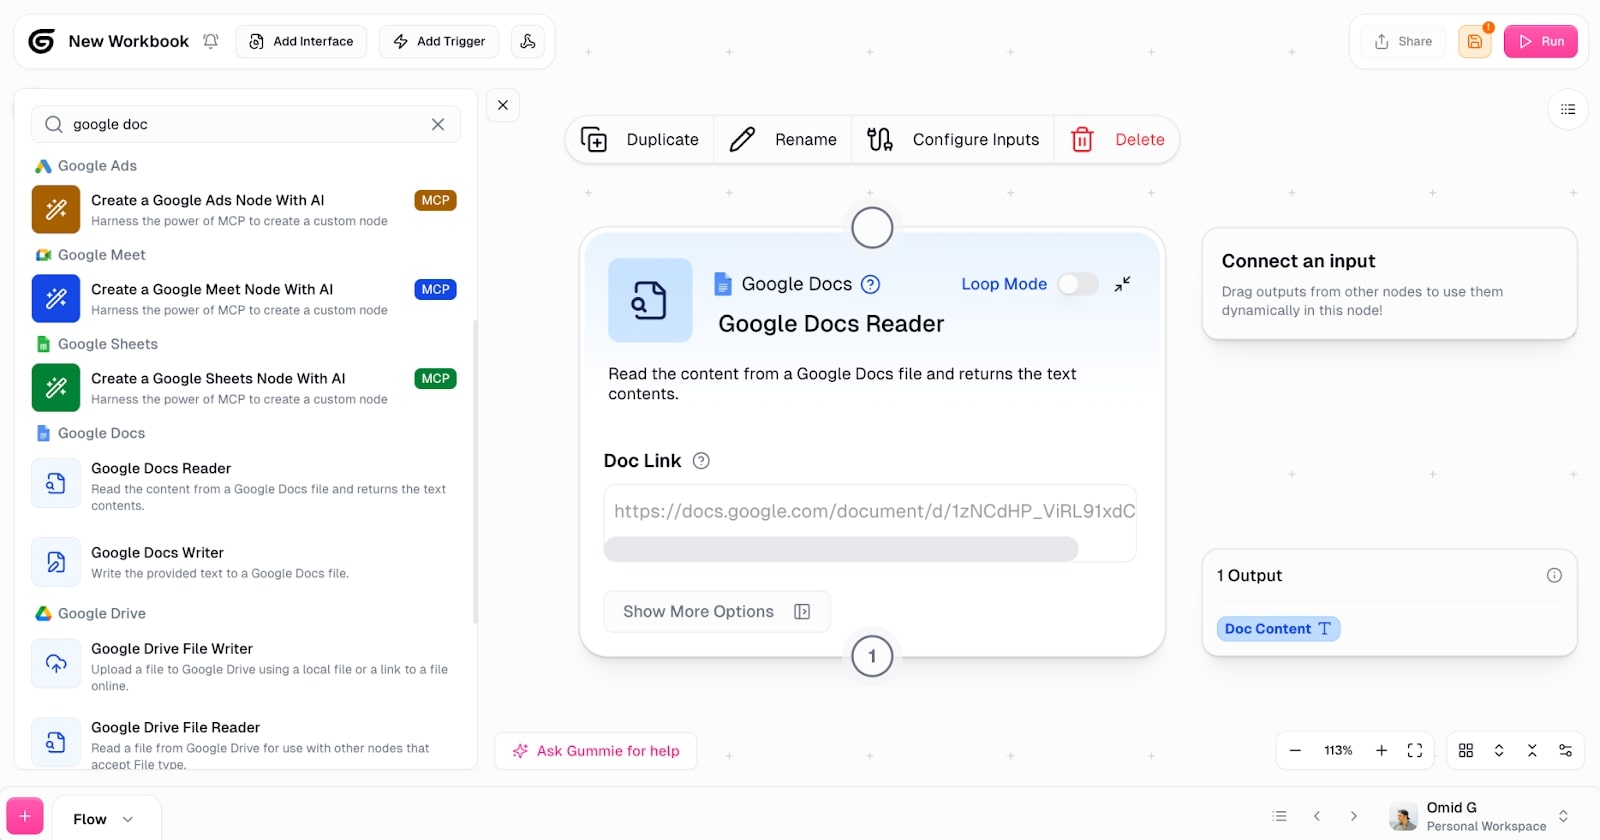
Come on. You can’t tell me this UI doesn’t look so sick.
The link is where we input the link to our draft. I’m going to leave it blank for now and move on to the second part. Next, we need AI to read our draft and use an LLM of our choice.
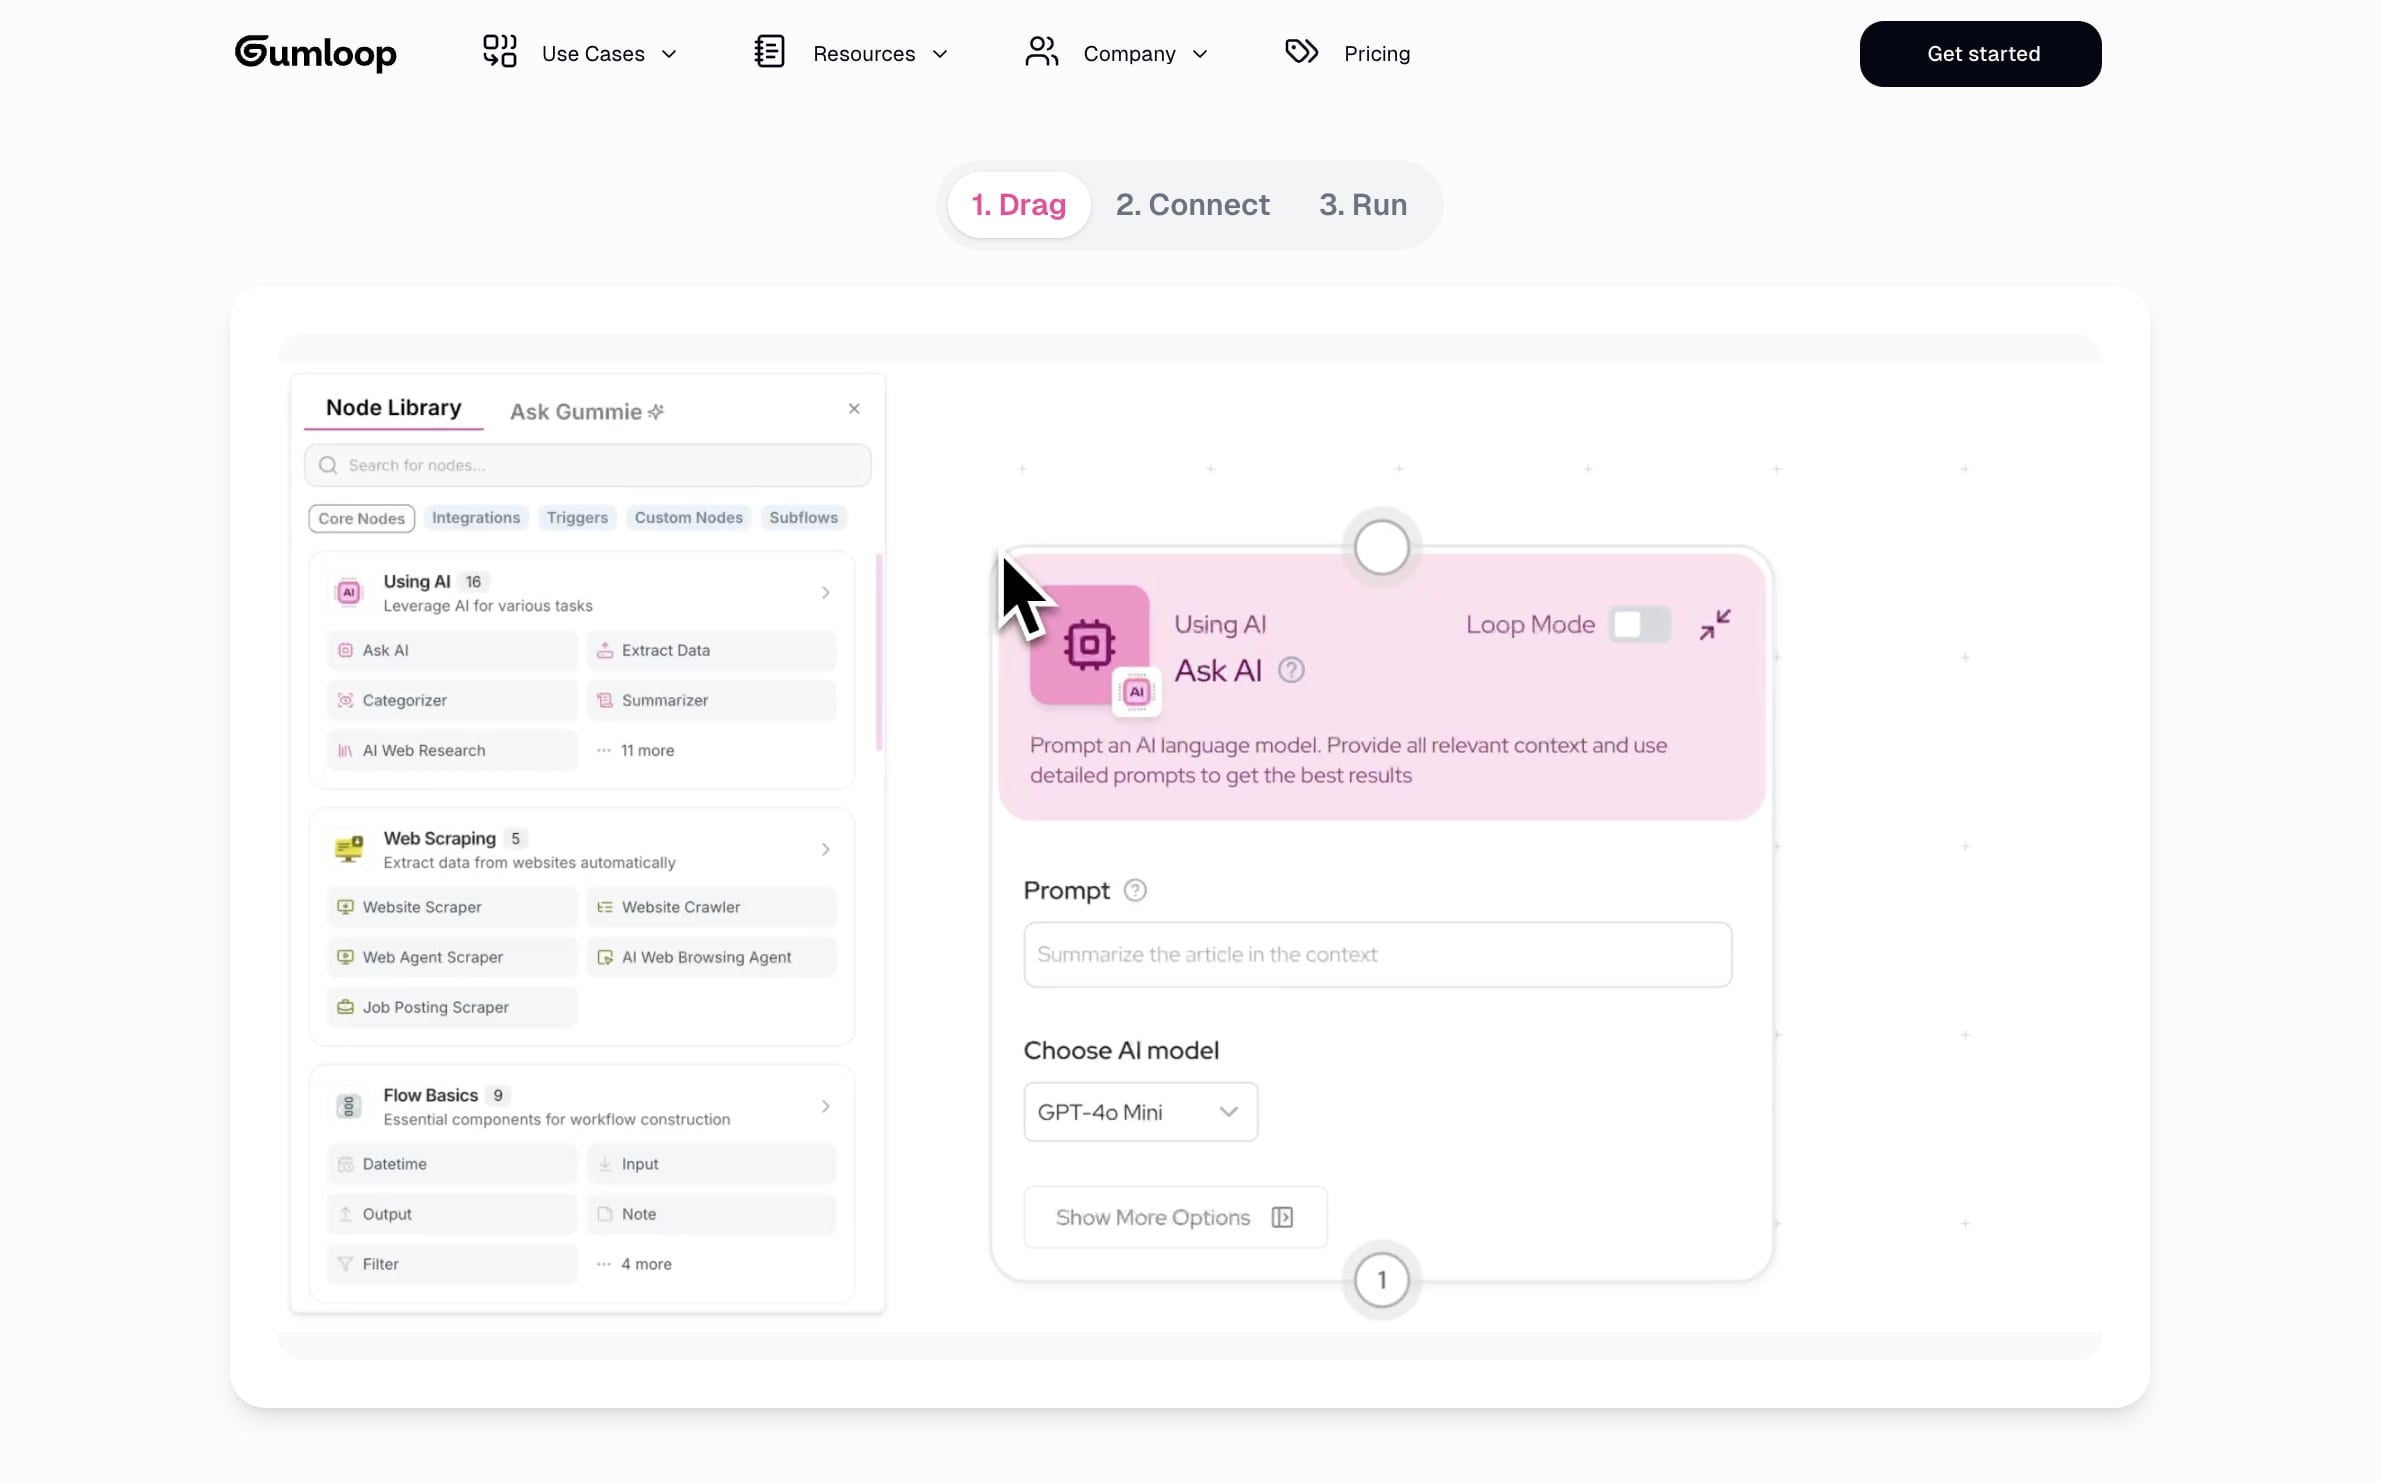
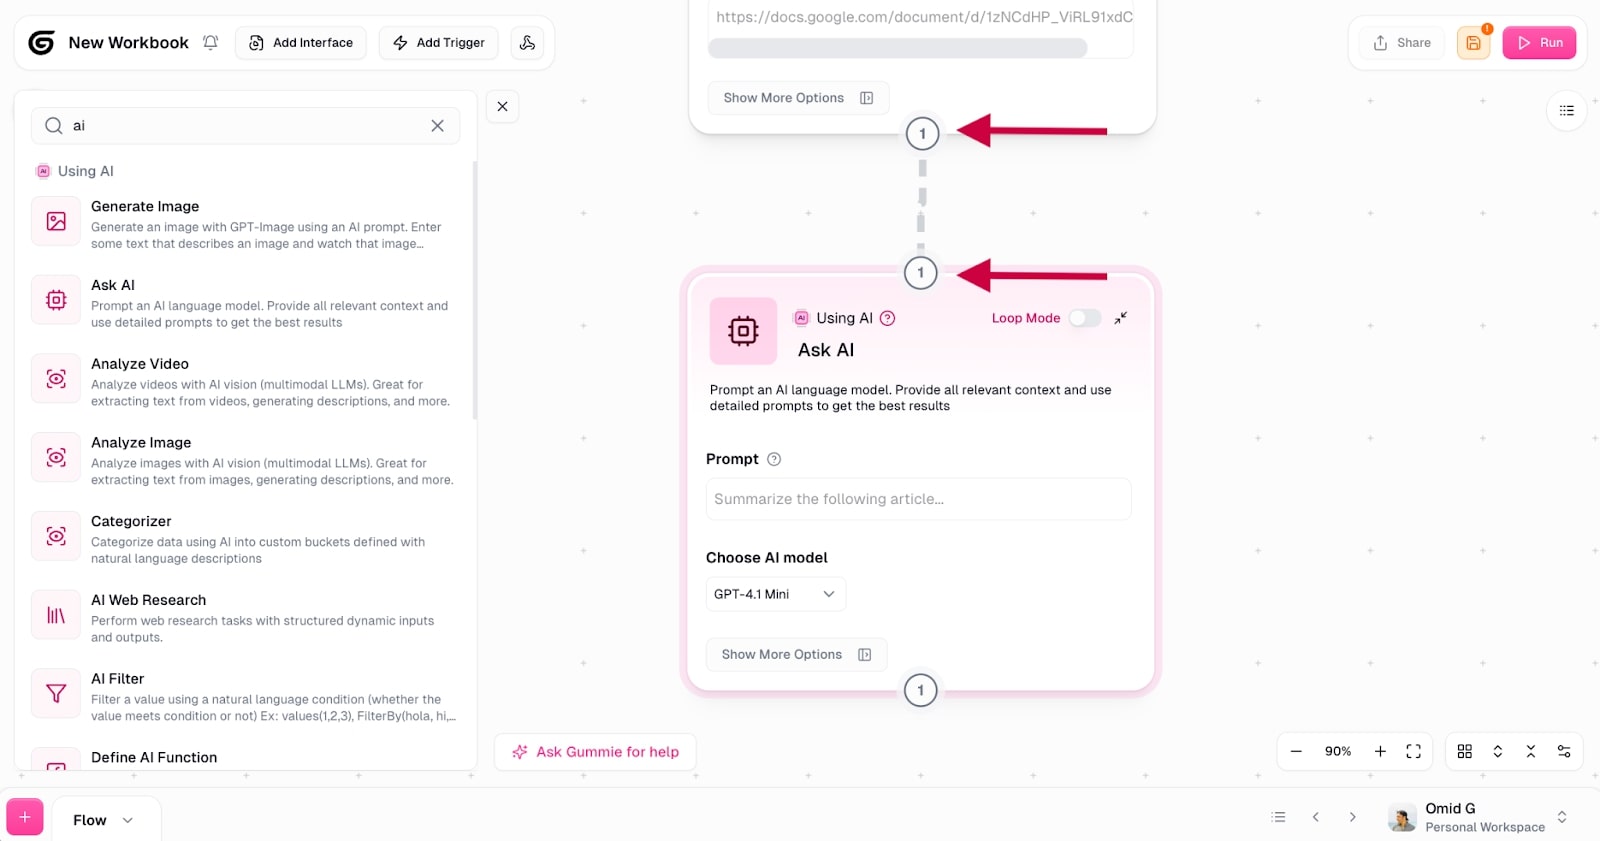
Search “AI” in the panel and drag the “Ask AI” node onto the canvas. Then, connect the Google Docs Reader to the Ask AI node by simply clicking and dragging on the little circle below and above the nodes (see arrows in the screenshot below).
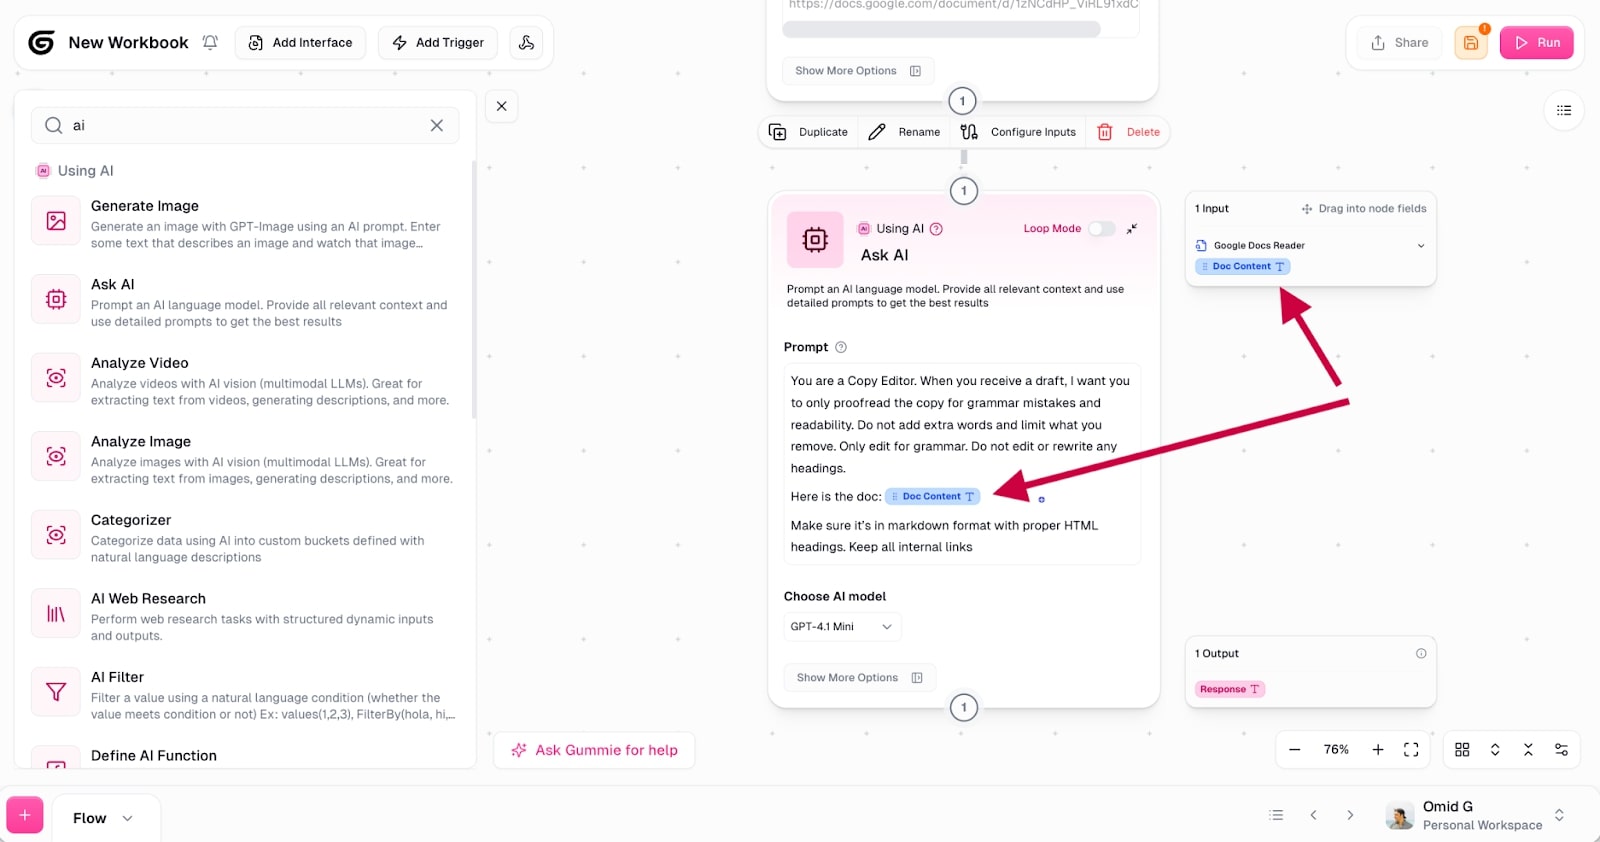
Now, in the ‘Prompt’ section in the AI node, we need to add our prompt. Here’s what I put:
You are a Copy Editor. When you receive a draft, I want you to only proofread the copy for grammar mistakes and readability. Do not add extra words and limit what you remove. Only edit for grammar. Do not edit or rewrite any headings.
Here is the doc: [Grab context from Google Docs Reader]
Make sure it’s in markdown format with proper HTML headings. Keep all internal links.
We need this prompt to have context of our Google Docs draft, so when you connect a node to another node, the context options will show up. In this case, the AI node shows that it has access to context from the Google Docs Reader node, labeled ‘Doc Content.
Drag this over into the prompt on the AI node so it has context (see arrows in the screenshot below).
You also have access to all LLMs (even the premium ones you would have to pay $20/month for). From Claude Opus to the paid models for ChatGPT.
This is what makes Gumloop different from other AI agent builders. You don’t need to pay for a separate ChatGPT or Claude account in order to have access to these premium models in your AI agents. Most AI agent builders require you to have a separate LLM account that you then integrate with their platform. Not with Gumloop. They eat the cost for you.
In this case, I’m to automate this with ChatGPT by selecting the GPT 4.1 mini as it’s good enough for being just a proofreader.
The more advanced LLM models you use, the more credits the AI workflow will use. So because this is not a very complex flow, I’m going to go with a simple model. You can also change the models in your flows once you build them and judge which outputs you like the most.
Okay, almost done. Now we need to drag another Google Docs node, this time the Google Docs Writer (not the reader like the first one).

In the screenshot above, I connected the ‘Ask AI’ node to the ‘Google Docs Writer’. Then, I dragged the ‘Response’ from the Ask AI input into the ‘Content’ of the Google Docs Writer. I also made sure the ‘Content Format’ was set to Markdown (this will make sure our headings keep their formatting from our original draft).
Here, you can also add a title. But before I do that, I’m going to save my flow and run it to test.
But before I do that, let me show you the initial draft. It’s full of grammar and spacing mistakes (because I used speech-to-text to create it):
I’m going to copy this draft link and paste it in the first Google Docs Reader node. Then, I’ll click run.
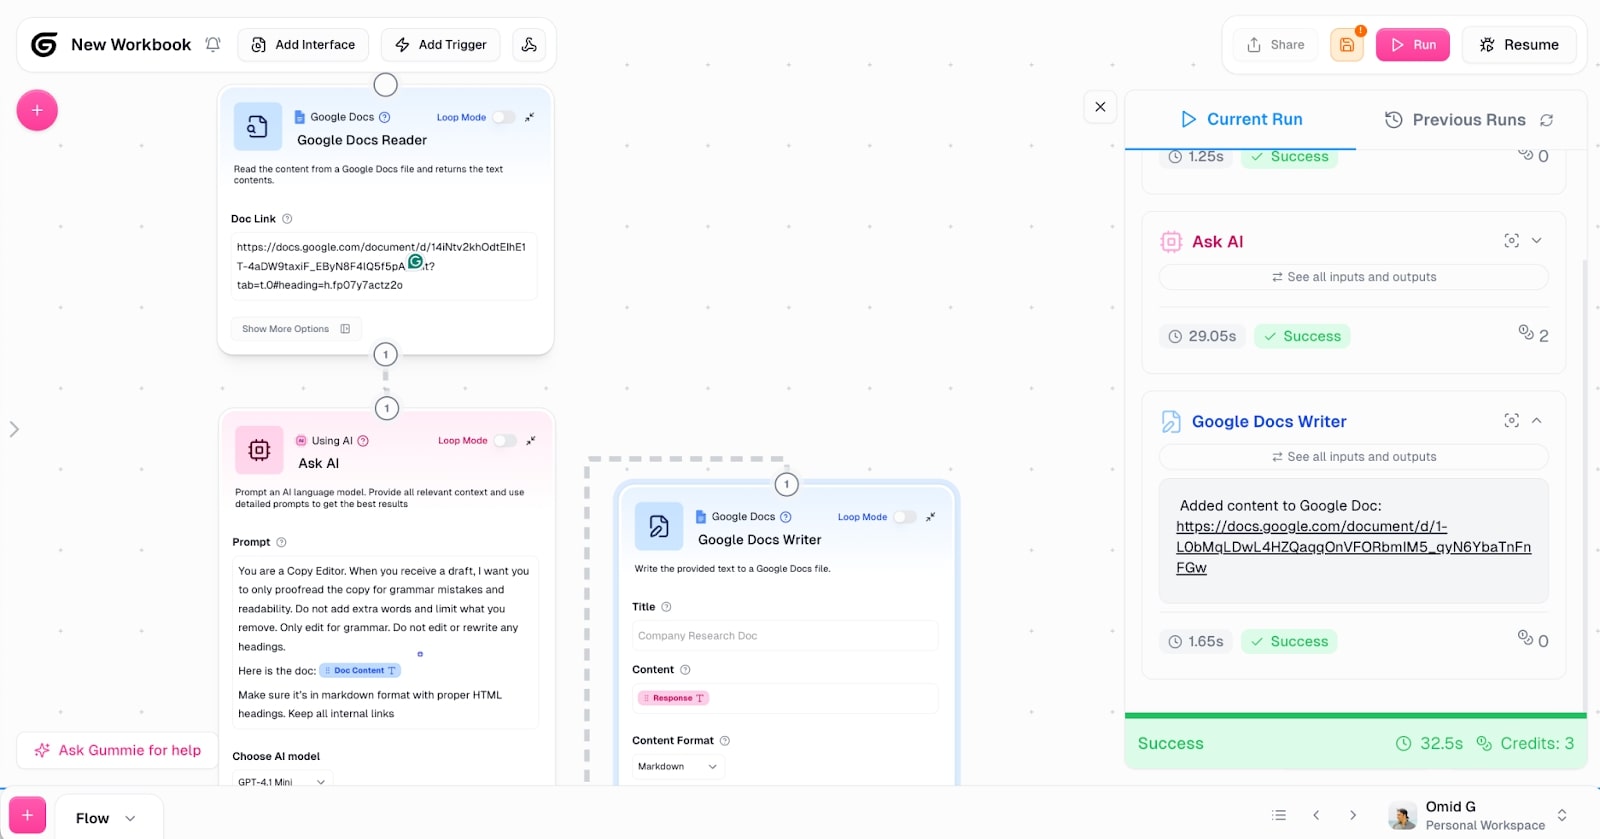
And there we go, we can see the run was successful! It also only used 3 credits (the free Gumloop account gives you 1,000 for context).
I also updated the prompt in the Ask AI node to make the directions clearer about the heading structures. How you prompt determines your final output, so keep playing around with it to get your desired output.
Here’s the final proofread doc the AI agent gave us
You can also expand your flows and feed the Ask AI node your brand voice and tone, and style guide so it can have the same context a human proofreader would have.
RIP the proofreading job. We literally just created an AI proofreader agent in 5 minutes. And it did the work of an editor that would have taken at least an hour or two in just 32.5 seconds.
If that’s not powerful, idk what to tell you.
Now, you can refine this flow. For example, you can add an Interface so you don’t have to open your actual canvas each time you use the AI agent. This is great if you want to share this app with any of your teammates or friends.
If you want to learn how to do that, you can check out this guide.
There are also tons of AI agent templates already you can clone and use for yourself as well.
5. Build your team of AI agents
Alright, you built your first AI agent! Now, it’s time to slowly build your army.
What we just created was a ‘Flow’. But in Gumloop, you can also create ‘Subflows’. These are essentially Flows that run within a large Flow.
So, for example, we just built an AI proofreader agent. But we can also create an AI agent to email a team member once this article has been edited. And then we can place our current Flow into that AI agent as a Subflow.
If you’re not sure what else you can automate, you can also ask Gummie. This is what it said when I asked for Subflow ideas:
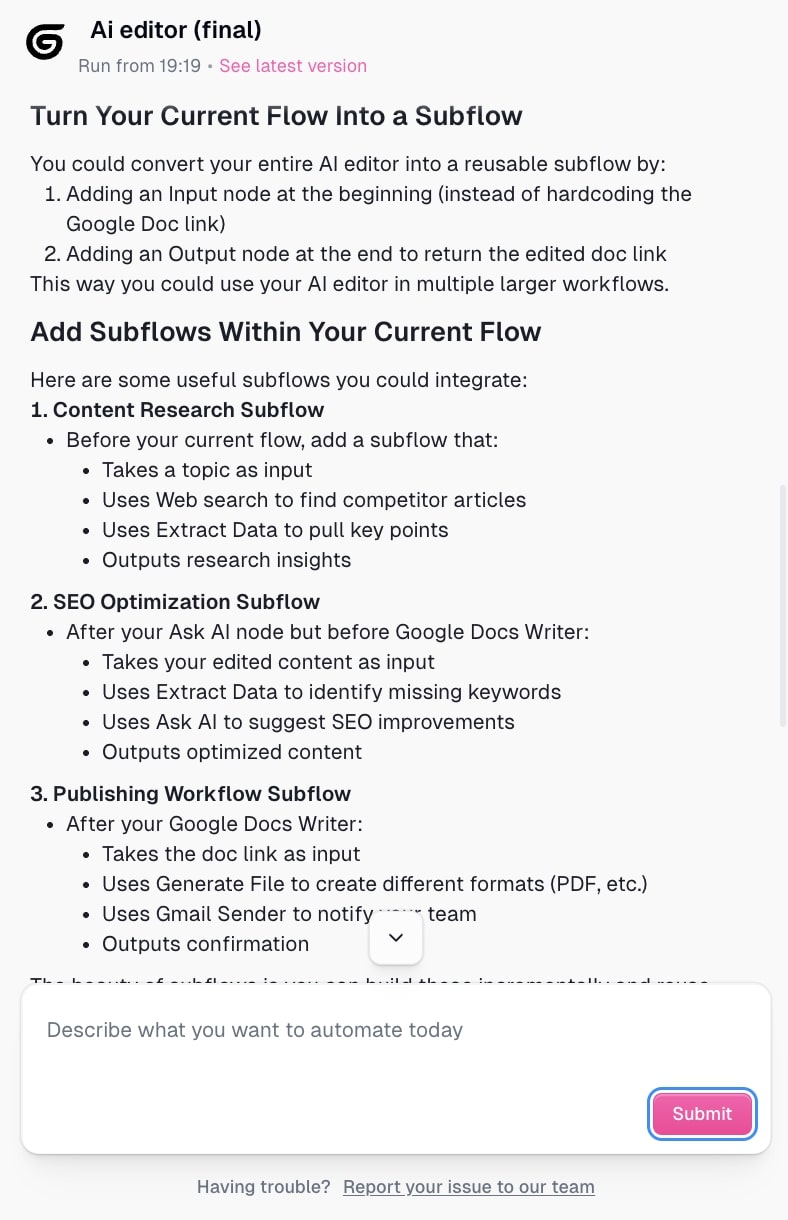
The possibilities are endless. And Gummie can even help you build out these flows.
So go build your AI agent employees!
Find more workflows that you can write out step by step and get building. If you’re not sure what else you can automate or you get stuck, ask Gummie. There’s no other platform that makes it so easy to build complex workflows. Gumloop literally allows you to become an AI Engineer without having to learn how to code.
And look, I know I’m really pushing this platform hard. They aren’t sponsoring me to say all of this. I just get a little too excited when I come across a tool that is genuinely useful, as a super smart team behind it, and has an amazing user experience. If I could have invested in them, I would have.
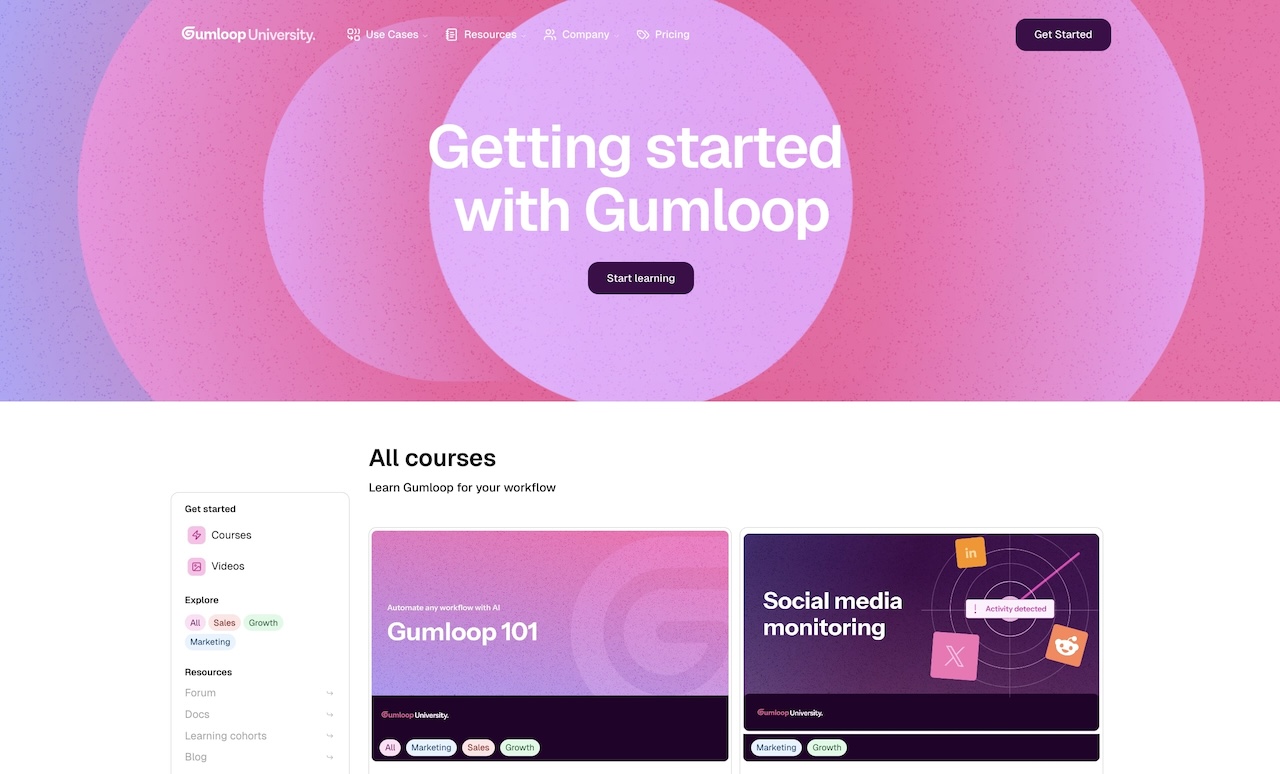
If you want to learn more about the platform and what it can do, be sure to check out Gumloop University for a bunch of free videos and courses.
That’s it, you got everything you need. Now it’s time to build your own agents that are unique to your own work.
How much does it cost to build an AI agent?
The cost of building an AI agent depends on which tools you need it to integrate with, how complex the workflow is, and what AI agent builder you use. In most cases, you can build your first AI agent for free using one of the automation platforms available.
In the case of this article, we just built a real AI agent for completely free. And we can build even more for free because of the generous free plan from Gumloop. But if you ever do decide to pay for Gumloop, you can use MARKETERMILK at checkout for 20% off your monthly subscription.
This isn’t a sponsored post, but Max (Gumloop’s CEO) saw how much I loved the platform and was generous enough to give me a discount and a code that I could share with my readers.
I hope you are now inspired and your creative juices are flowing. There’s never been a better time to be in tech and build the tools that were once only ideas in your head.
Here’s to building AI agents that give us our time back!
agree to our Terms.


Get the weekly newsletter keeping +33,000 marketers in the loop.